Skip to content
  • NSW-first CPD, built by a practising builder
  • Instant PDF certificates
  • Unlimited assessment attempts
  • 12 points a year, sorted
  • 15% off your first order — get your code
  • Content aligned to the NCC 2022

Free template Inspections and quality

Free pre-plasterboard inspection checklist (pre-lining)

The last look inside the walls: insulation, electrical and plumbing rough-in, noggings, nail plates, wet area board, fire and acoustic details and BASIX commitments.

The short version

Before plasterboard goes on, check insulation to the specification and BASIX commitments, electrical and plumbing rough-in complete and tested, noggings and blocking for every fixture, nail plates over services, wet area board and fire or acoustic details, and that the frame is straight enough for a good finish. Photograph every wall. After lining, every one of these is hidden.

  • No sign-up
  • Free for commercial use
  • Add your own logo
  • Updated 14 Sep 2026

Reviewed by Daniel Betros, Licensed Building Practitioner

Animated walkthrough · 6 steps

How to do a pre-plasterboard inspection

Six steps. Walk every room with the plans, the electrical layout and the BASIX certificate.

1 / 6
  1. The frame inspection and any defects from it are closed out, and lock-up is complete so linings stay dry.

  2. Wall and ceiling insulation of the specified type and rating installed without gaps, compression or missing sections, matching the BASIX or energy compliance commitments.

  3. Electrical, data, plumbing, gas and HVAC rough-in complete, in the right positions, tested where required, and protected with nail plates where they pass through studs.

  4. Solid fixing for cabinetry, vanities, towel rails, shower screens, TV mounts, grab rails and heavy fittings. Adding it after lining means cutting the board.

  5. Water-resistant board where required, fire-rated and acoustic linings and sealing where designed, and smoke alarm and exhaust positions.

  6. Photograph each wall and ceiling, especially services, then release to the plasterer. Those photos save hours when someone later needs to find a pipe.

The pre-plasterboard inspection is the most useful hour a builder can spend between frame and handover. Once the plasterer starts, the inside of every wall and ceiling disappears for good: the insulation that was never fitted behind the bath, the towel rail with no nogging, the pipe with no nail plate that a picture hook will find in three years. This checklist walks every room before that happens.

What is inside a wall that matters

ItemWhat goes wrong if it is missed
InsulationGaps and compression cut thermal performance; the house fails to meet the energy commitments it was approved on
Services rough-inPower points in the wrong place, taps at the wrong height, a missing data point, cutting new holes in finished walls
Nail platesA plasterboard screw or picture hook through a water pipe or a cable, discovered after handover
NoggingsTowel rails, vanities and TV mounts with nothing solid to fix to
Wet area boardStandard board in a wet area, which the waterproofing system cannot rely on
Fire and acoustic detailsGaps in fire separation or sound insulation that fail inspection or cause complaints

Insulation and the energy commitments

A house’s energy performance is approved on the basis of the insulation, glazing and other measures in its design. In NSW, those are the BASIX commitments, and the certifier needs to be satisfied they were met before issuing the occupation certificate. Check the type and rating of insulation against the certificate, and check the installation: insulation with gaps around noggings, compressed behind services or missing behind baths loses much of its value. Keep product details and photos as evidence. Our insulation and sarking course covers the installation details that decide performance.

Services: check positions against selections

Walk each room with the electrical layout and the owner’s selections. Power points behind where the fridge will go, the bedside switches, the TV point height, the mixer heights for the chosen tapware: every change after lining costs plaster, paint and time. Check plumbing is pressure-tested, gas rough-in tested by the gasfitter, and exhaust fans ducted to outside rather than into the roof space.

Nail plates and fixing zones

Where pipes and cables pass through studs or plates close to the face, a steel nail plate stops a screw going through them. Check every one. Also check that services are not running through the zones where cabinetry, rails or mounts will be fixed.

Noggings: walk it as the owner will live in it

Stand in each room and ask what will hang on each wall. Kitchen cabinets, vanities, towel rails, toilet roll holders, shower screens, curtain tracks and TV mounts all need solid fixing. Blocking for future grab rails in bathrooms is cheap now and expensive later, and increasingly expected. Adding a nogging after lining means cutting and patching.

Wet areas, fire and acoustics

Wet areas need the specified water-resistant lining and a frame ready for the waterproofing details, which are then checked with the waterproofing inspection checklist before tiling. Where the design includes fire-rated or acoustic systems, such as walls between attached dwellings or the garage-to-house wall, check they are specified and that penetrations will be sealed with approved systems.

Photograph everything

Photograph every wall and ceiling before lining, room by room. It takes twenty minutes. The photos show exactly where services run, which saves hours and damaged walls when something needs to be found later, and they are evidence that insulation and details were installed. Then release the room to the plasterer, and move the next checkpoint, the practical completion inspection, onto the program.

Walk it with the owner

Pre-lining is the best moment to walk the house with the owner. The frame is up and the services are in, so they can see the layout, stand where the kitchen will be, and check the power point by the bed or the TV point height before it is too late. It costs an hour, it catches changes that would otherwise become expensive variations after lining, and it builds trust. Record anything the owner asks for as a variation before the plasterer starts.

A BASIX and energy evidence checklist

In NSW, the certifier must be satisfied the BASIX commitments were met before issuing an occupation certificate. The evidence is far easier to collect at pre-lining than to reconstruct later. Keep a folder with:

  1. insulation product details and delivery dockets matching the commitments;
  2. photos of wall and ceiling insulation installed in each area;
  3. glazing specifications and labels for windows and doors;
  4. details of any other commitments visible at this stage, such as sarking or ceiling fans;
  5. notes of any substitutions, and confirmation they still meet the commitments.

A certifier who can see the evidence in one place signs off faster. Our BASIX course explains the commitments and how they are verified.
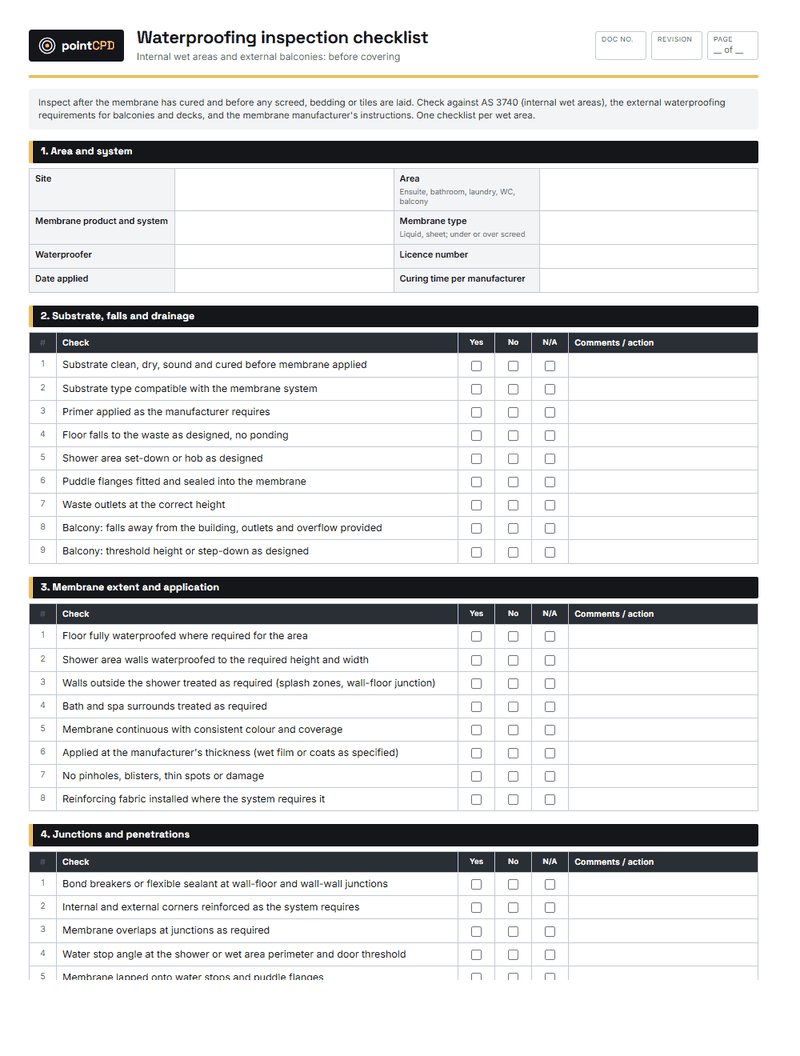
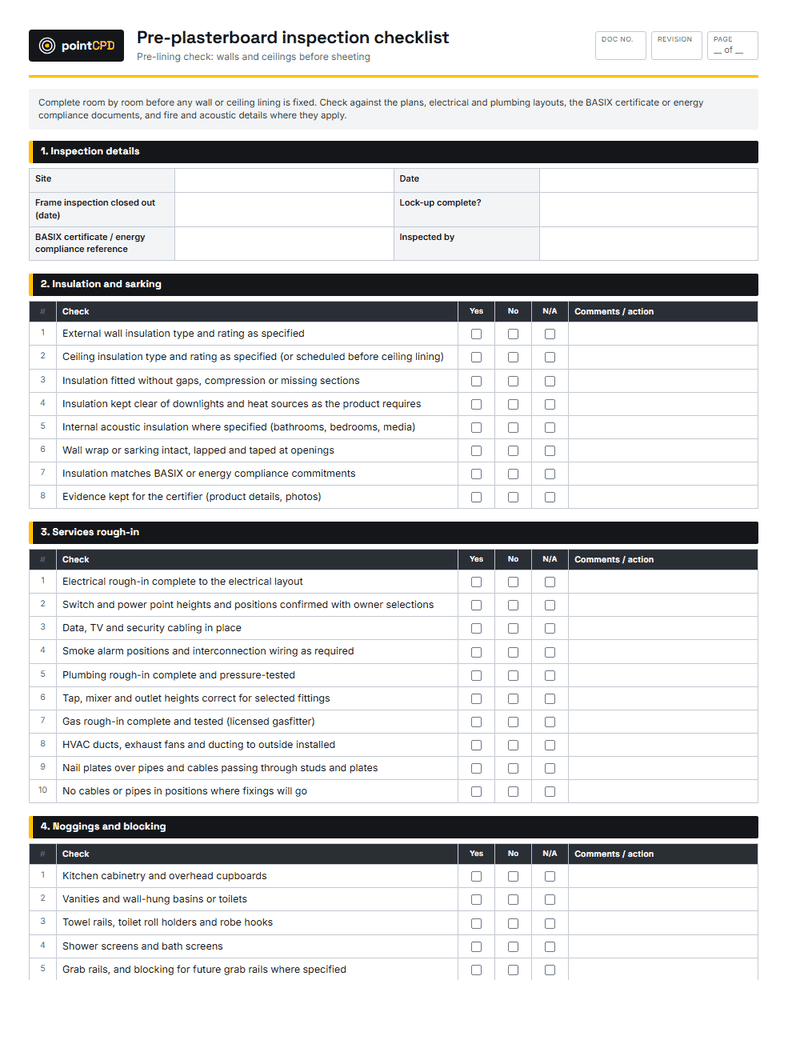
Preview the full Pre-plasterboard inspection checklist template

Every section, field and check in the download, exactly as it prints. Edit the Word version to add your logo, delete what does not apply and add your own site-specific items.

pointCPD

Pre-plasterboard inspection checklist

Pre-lining check: walls and ceilings before sheeting

Doc no.
Revision
Page
__ of __

Complete room by room before any wall or ceiling lining is fixed. Check against the plans, electrical and plumbing layouts, the BASIX certificate or energy compliance documents, and fire and acoustic details where they apply.

1. Inspection details

SiteDate
Frame inspection closed out (date)Lock-up complete?
BASIX certificate / energy compliance referenceInspected by

2. Insulation and sarking

#CheckYesNoN/AComments / action
1External wall insulation type and rating as specified
2Ceiling insulation type and rating as specified (or scheduled before ceiling lining)
3Insulation fitted without gaps, compression or missing sections
4Insulation kept clear of downlights and heat sources as the product requires
5Internal acoustic insulation where specified (bathrooms, bedrooms, media)
6Wall wrap or sarking intact, lapped and taped at openings
7Insulation matches BASIX or energy compliance commitments
8Evidence kept for the certifier (product details, photos)

3. Services rough-in

#CheckYesNoN/AComments / action
1Electrical rough-in complete to the electrical layout
2Switch and power point heights and positions confirmed with owner selections
3Data, TV and security cabling in place
4Smoke alarm positions and interconnection wiring as required
5Plumbing rough-in complete and pressure-tested
6Tap, mixer and outlet heights correct for selected fittings
7Gas rough-in complete and tested (licensed gasfitter)
8HVAC ducts, exhaust fans and ducting to outside installed
9Nail plates over pipes and cables passing through studs and plates
10No cables or pipes in positions where fixings will go

4. Noggings and blocking

#CheckYesNoN/AComments / action
1Kitchen cabinetry and overhead cupboards
2Vanities and wall-hung basins or toilets
3Towel rails, toilet roll holders and robe hooks
4Shower screens and bath screens
5Grab rails, and blocking for future grab rails where specified
6TV and heavy wall mounts
7Curtain and blind fixings
8Plasterboard edge and joint support as the lining manufacturer requires

5. Wet area, fire and acoustic details

#CheckYesNoN/AComments / action
1Water-resistant lining board specified for wet areas
2Wet area frame and noggings ready for waterproofing details
3Fire-rated linings and systems in fire-separating walls or ceilings as designed
4Penetrations in fire-rated elements to be sealed with approved systems
5Acoustic wall and ceiling systems as designed
6Garage-to-house door and wall details as designed
7Frame straight and flush enough for linings (high studs planed or packed)

6. Room-by-room notes

RoomIssueAction / whoDone

7. Released for lining

Photos of every wall and ceiling taken?Services tested and certified where required?
Released byDate
Template by PointCPD · pointcpd.com.au/resources/templates/pre-plasterboard-inspection-checklist/Free to use, copy and adapt, including commercially (CC BY 4.0). Keep this credit line.v1.0

Download Word Download PDF

Questions builders ask

What is a pre-plasterboard inspection?

A check of the inside of the walls and ceilings before they are lined: insulation, services rough-in, noggings, wet area preparation, and fire and acoustic details. It is the last chance to see and fix them without cutting the lining.

Is a pre-plasterboard inspection mandatory?

It is not one of the NSW mandatory certifier inspections in its own right, but the framework inspection must be done before covering, and the certifier will need evidence that insulation and other commitments were met. Many builders and owners also commission their own independent pre-lining inspection.

Why check insulation before lining?

Because it cannot be checked afterwards without removing linings, and missing or compressed insulation undermines the energy performance the house was approved on. In NSW the BASIX commitments include insulation, and the certifier needs evidence they were met.

What are nail plates for?

Steel plates fixed over pipes and cables where they pass through studs close to the face, so a plasterboard screw or a picture hook cannot pierce them. Missing nail plates cause leaks and electrical faults after handover.

What noggings are most often forgotten?

Towel rails, toilet roll holders, shower screens, wall-hung vanities, TV mounts and grab rails. Walk each room with the owner's selections and ask what will be fixed to each wall.

Should I photograph walls before lining?

Yes, every wall and ceiling. The photos show where pipes and cables run, which saves time and damage later, and they are evidence that insulation and details were installed.

Free to use, adapt and share, including commercially

This template is licensed under Creative Commons Attribution 4.0. Copy it, rebrand it, edit it for your jobs, hand it to clients and subcontractors, or republish it. The one condition: keep the small PointCPD credit line on the document. If you publish it online, credit it like this:

<a href="https://pointcpd.com.au/resources/templates/pre-plasterboard-inspection-checklist/">Pre-plasterboard inspection checklist template</a> by PointCPD, CC BY 4.0

Last reviewed 14 September 2026. A template is a starting point: it becomes a compliant document only once it is completed for the actual job by people who understand the work, and kept current as the work changes. General information, not legal advice. Check the requirements of your state regulator and your contract.

Sources: National Construction Code, Housing Provisions (energy efficiency, fire separation, sound insulation, smoke alarms). BASIX (NSW) commitments. Plasterboard manufacturers' installation guides. Standards referenced by the NCC for services (not reproduced).